NLS Version 10.6 Release Notes
Neota Logic Version 10.6 brings a swathe of exciting new capabilities for Neota Logic authors, making it easier than ever to build powerful and elegant business solutions. Highlights of NLS 10.6 include:
The new Asset Manager significantly enhances how assets are uploaded and managed across applications on a Neota site.
Neota users with the role of author (including Canvas and Workbench author) and site administrators will find a new tab on Workbench: Assets.
From the Assets tab, Neota authors and admins can manage and view existing application assets, and upload new assets.

What is an 'Asset'?
-
Preview image assets — in a grid or detail view
-
Organize assets with searchable tags — filter and search tags for quicker asset navigation
-
Search for assets — search by keywords to find a specific asset
-
Export assets — download and save assets to your computer
-
Manage permissions — control who on your site can modify or access assets
-
Usage information — see all the apps in which an asset is used
-
Upload new assets — drag and drop from your computer into the web browser
-
Recycle bin — recover assets deleted by accident

Changes to Studio


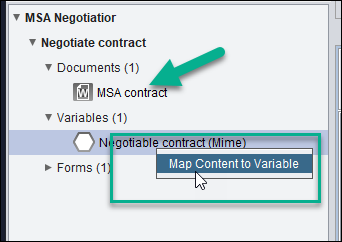
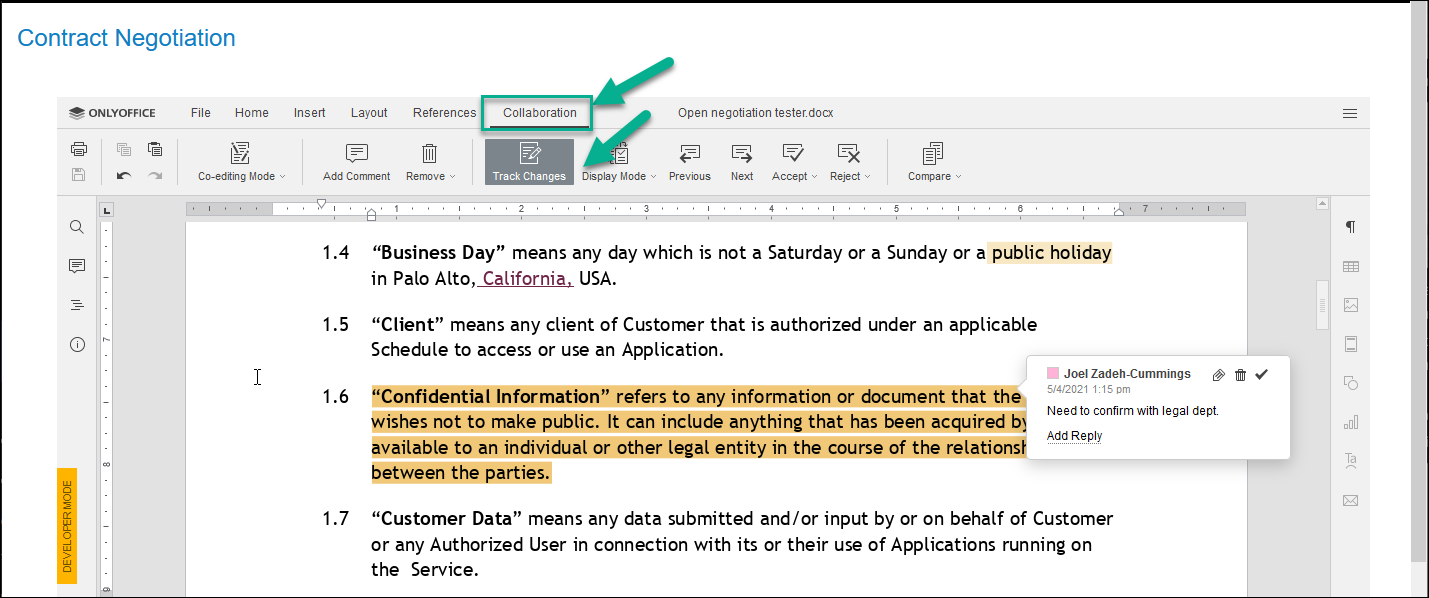
Get started negotiating your first document!

The Neota Logic Connector for SharePoint is now live on the Microsoft AppSource store.

We regularly add new content to the Neota Library—including application building blocks and instructional resources.
New Building Blocks
Building blocks are ready-built application components that can be integrated into larger solutions. With v10.6 there are three new building blocks.
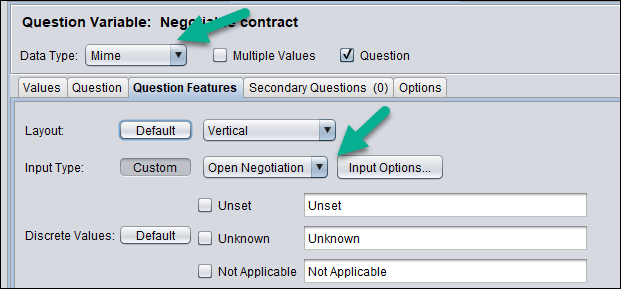
Open Negotiation Connector Building Blocks
Use the Open Negotiation building blocks to get a quick start with our new negotiation capability, These building blocks provide a pre-built workflow that passes the document back and forth between users until the text is accepted.

Neota SharePoint Connector Building Blocks

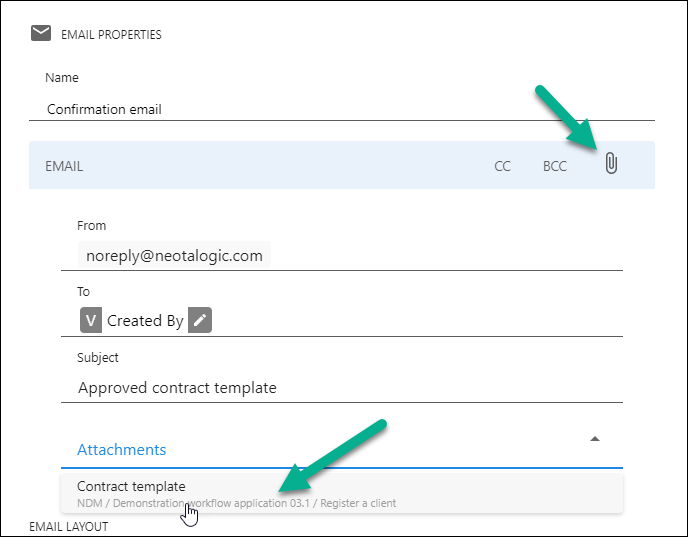
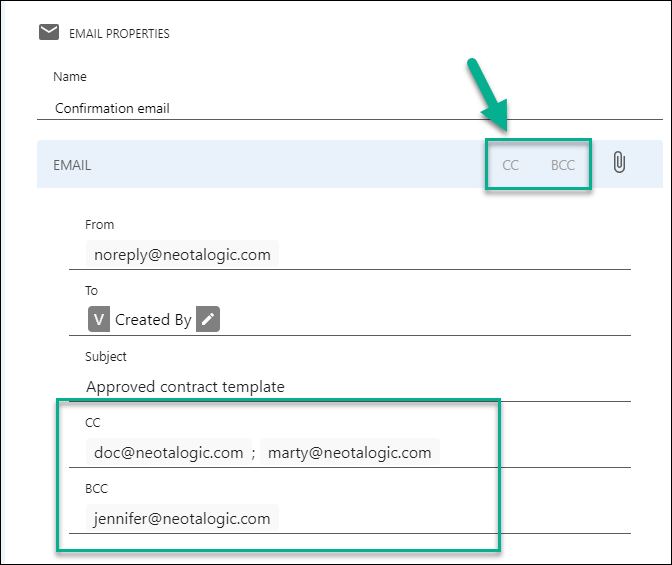
The Email Node for Workflow has been significantly enhanced.
Email attachments
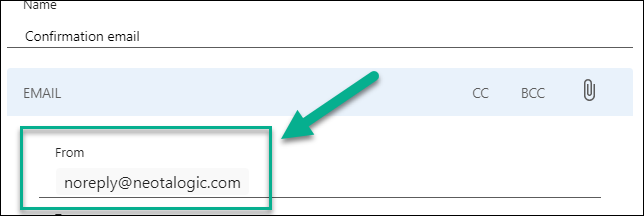
'From' address
CC & BCC
NLS version 10.6 includes a number of enhancements and updates for Workflow to improve author productivity and end-user experience.
With NLS v10.6 Workflow authors can now specify a translation for a Workflow. This ensures that when applications in the Workflow are launched, they will appear in the expected language.
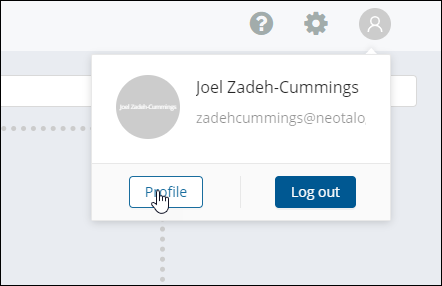
From the user profile page, select a language from the 'Preferred language for Workflows' field.
Once set, any Workflow launched by your account will be launched with a translation of your preferred language, if such a translation exists.


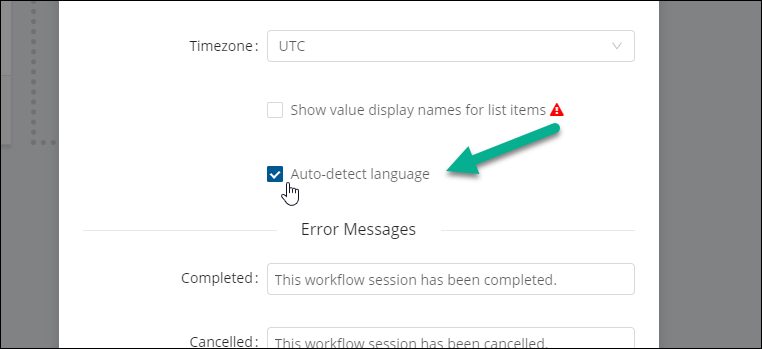
Toggle 'Auto-detect language' on.
-
Workflow ID: an identification number for the Workflow.
-
Workflow Resume URL: a URL to resume the Workflow by continuing from the current Session State.
-
Workflow Session ID: an identification number for the Workflow session.
-
Workflow Version: the version number of the version being run. If no version is specified or 'run draft' is clicked, it will read 'vdraft'.
Canvas – General
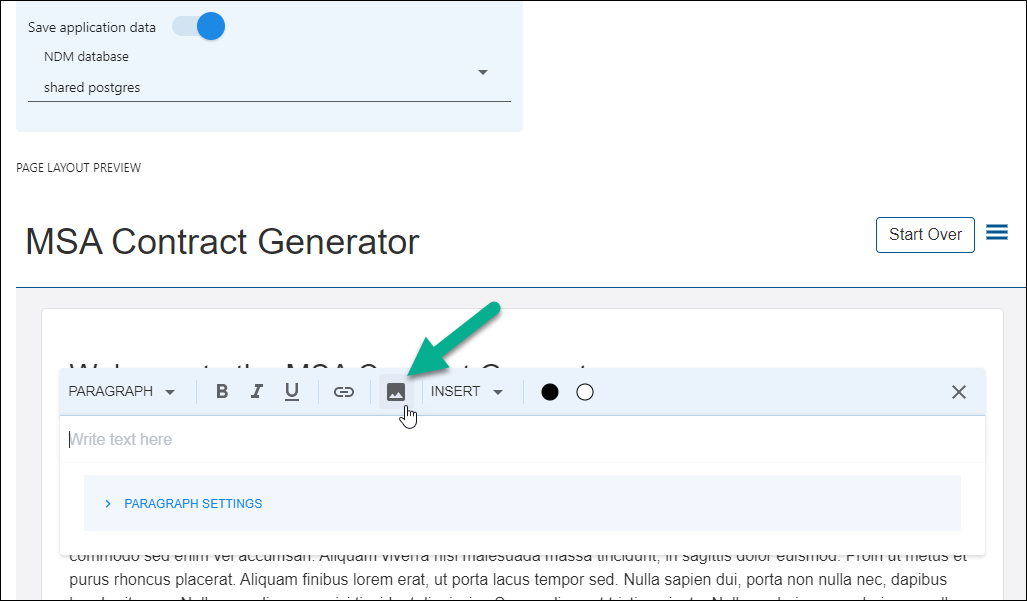
Canvas has been further improved with NLS version 10.6. With support for block image insertion and a redesigned formula node, it's now easier than ever to rapidly deploy professional, functional, and visually appealing web applications with Canvas.
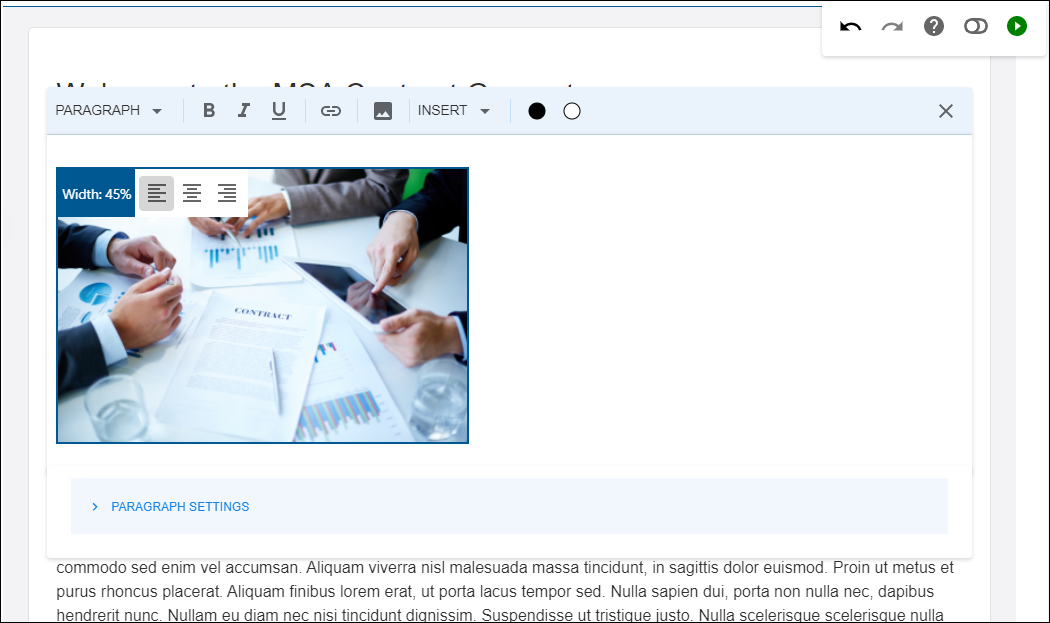
Add images to Canvas applications
The image can be resized by dragging the rightmost edge or aligned to the left, centre, or right by clicking on one of the three alignment buttons.
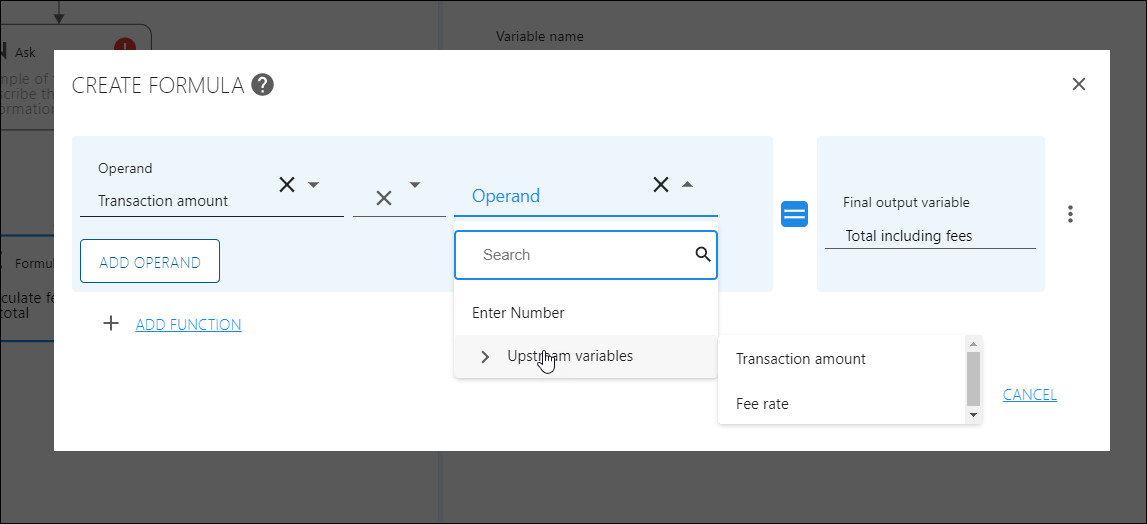
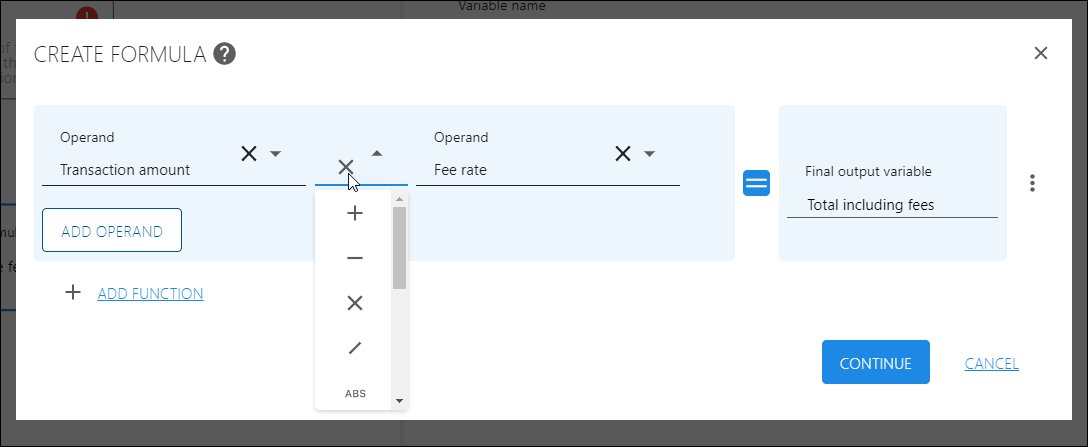
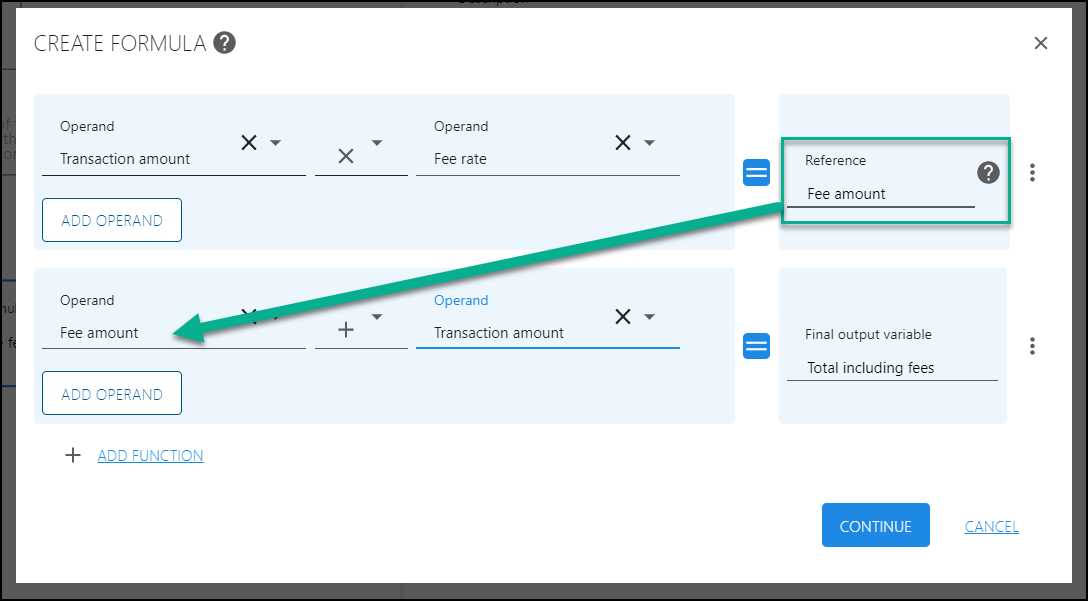
Redesigned Formula Node
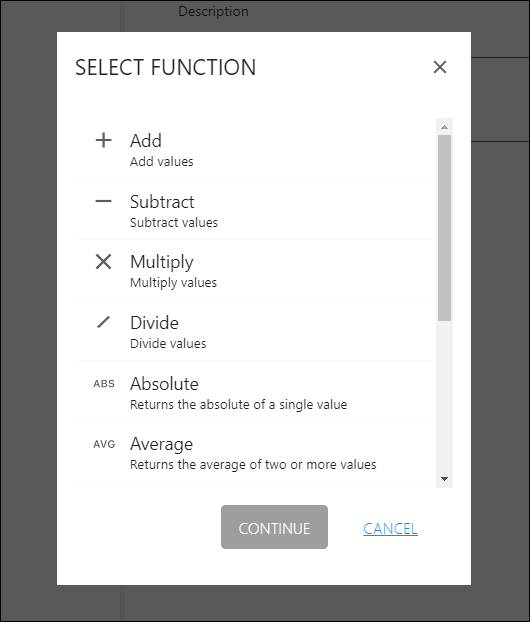
Enter values for each operand by entering one by hand, or referencing a system variable or upstream variable value.
Change the operation by clicking on the operator.
We can now assign a name to the product of the first function and then use it as an operand in the next function.

Click the 'Remove' button in the warning dialogue to confirm.

New 'Repeats' tab in Studio Document Editor
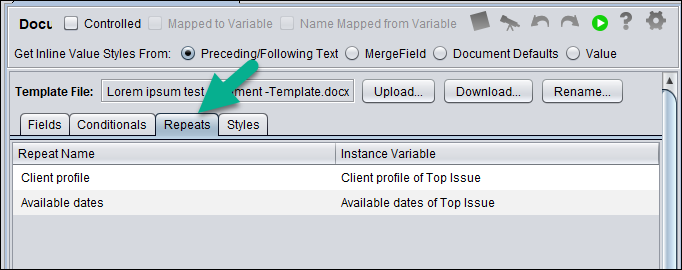
From here authors can review existing variable mappings to repeat tags and re-map them by highlighting the row to change, target-dropping the variable to link to the repeat tag, and selecting 'Map X to Repeat'.
Sessions
Improvements to Sessions help Workbench users and Workflow owners view and download the data they need more efficiently.
Download visible session data only
WIth NLS v10.6, users can download either (1) all available data the user has permission to access, or (2) only the columns appearing in their personal session view. To download only selected data columns, configure your personal session view as you wish, then select download.

All available session data can be downloaded by checking the 'Download all available data' toggle.
Statistics
NLS v10.6 brings two new additions to the statistics page: detailed Workflow data and application activity data. These pages provide more essential data points and insights for subsite administrators to see how their site's workflows and applications are being utilized at-a-glance.
Both pages can be accessed from the 'Statistics' screen, which is the first tab of the Workbench Settings page (accessible via the gear icon on the top-right of your screen).
In addition to the main overview, there are now two tabs for Workflow and Application Usage data.

Workbench
Workbench site customization and user administration have been improved.
Customize site favicon

To set a custom favicon, navigate to the 'Settings' page, choose 'General' from the left sidebar and select the 'Customize' tab.
Click the existing favicon to change to one of your choice.

User details screen improvements

Products tab changed to Workflows

Studio
Sort PDF form fields alphabetically